Welcome to our comprehensive guide on how to login and make the most of Leonardo AI. In this article, we will walk you through the login process, explore the various features and functionalities of Leonardo AI, and provide valuable insights to help you leverage this powerful tool effectively. Whether you’re a beginner or an experienced user, this guide will equip you with the knowledge you need to navigate Leonardo AI like a pro.

Logging in to Leonardo AI
To begin your journey with Leonardo AI, you first need to access the login page. Follow these simple steps to get started:
- Go to the Leonardo AI website and click on “Get Early Access” to start the process

2. Give Leonardo AI the email address you want to use to log in and join their Discord community.
3. Launch a web browser, go to the Leonardo AI Discord, and sign up.
4. After connecting to the server, look for the “getting-started” channel in the list of accessible channels on the Discord interface’s left side.
5. Select the language of your choice from the “getting-started” channel. Select the appropriate language-specific channel by clicking on it.
6. Go to the “priority-early-access” channel, which is also included in the channel directory, after joining the language-specific channel.
7. Within the “priority-early-access” channel, you will find the whitelisting form. Open the whitelisting form and fill it up with the required data. As well as the email address where you want to receive Leonardo AI’s newsletter updates, be sure to input it.

8. Keep a look out for a communication from Leonardo AI in your specified email account. You will be directed to a login screen if you follow the directions in the email. To register for a Leonardo AI account, click “Sign up”.

9. After successfully logging in for the first time, Leonardo.ai’s home screen will be displayed to you.
Congratulations! You have successfully logged in to Leonardo AI and are now ready to explore its array of features and functionalities.
How to Use Leonardo AI
A user-friendly interface that is straightforward to navigate and utilize is offered by Leonardo AI. The actions below should be followed in order to access and use Leonardo’s features:
Go to the Leonardo AI login page in your web browser after it has opened.
- Utilize your registered login information to access your Leonardo AI account.
- When you log in, a left sidebar with a variety of options will appear.
- Choose the one that most closely matches your needs from the sidebar. Choose the canvas editor, train your model, or upscale envision, for instance.
- Position your cursor over the image you want to edit in the canvas editor.
- Examine the sidebar’s editing tools. You can use these tools to resize, crop, and alter the color of the images produced, as well as additional editing options.
- Try out different editing features and adjustments to get the result you want.
- Use the sidebar’s editing tools and selections to customize the model if you want to create your own.
- When prompted, save your work and download the altered picture or model.
But how to generate images in Leonardo AI tool?
Here is a short, step-by-step tutorial for using Leonardo-AI’s image generating feature:
- Log into your account on the Leonardo AI website.
- The Leonardo AI homepage will appear once you have signed in. On the left side of the page, look for the navigation menu.
- Find and select the “Featured Models” item in the navigation menu.
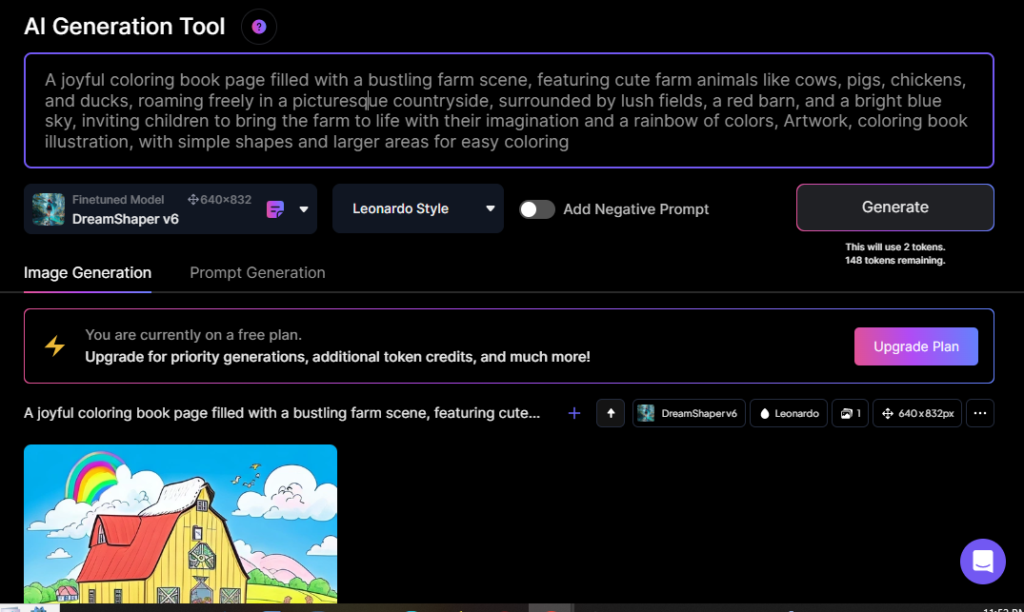
- A list of models will be shown in the “Featured Models” section. Click on the one that appeals to you to select it. You can select “DreamShaper v6” as an example.
- A new page will load after you click on the appropriate model. You can choose to “Generate with this Model” on this page. Just click it.
You can set the parameters for image generation in the Generation View by performing this operation, which will bring you to step 6. - On the left side of the screen in the Generation View, there are numerous settings and options. The number of photos to generate, the size of the images, and other advanced options can all be changed if needed.
- A text box with the label “Type a prompt” can be found at the top of the page. The text prompt or description for the image you want to generate can be entered here.
- Scroll down or look for the “Generate” option on the website after entering your suggestion. To start the image generation process, click on it.
- Leonardo AI will analyze your request and produce the image in accordance with the provided instructions. On the screen, the created image or images will show.
- After that, by selecting the “Download” button, you may download the image.
Lets look at following screenshots to verify if you are doing it the right way…


Create one image from another image
Use the following steps to use the image-to-image generation function of Leonardo AI to build new images from current ones:

- Access your account by logging in to the Leonardo AI website.
- Visit the “Image to Image Generation” tab after logging in. Click on it to obtain the necessary functionality.
- The photograph you want to use as the foundation for a new image should be uploaded. The alterations will begin using this image as their starting point.
- You should type a prompt that accurately describes the adjustments you want to make to the uploaded image. You could say, for instance, to “enhance the blue color of the sky” or “incorporate a tree into the background.”
- Click the “Generate” button to start creating the image after entering your question.
- Your prompt will be processed by Leonardo AI, which will use the data to create a new image
Alternatives of Leonardo AI
There are substitutes that offer equal functionality if, for any reason, you are unable to access your Leonardo AI account. On the internet, you may find a variety of tools and apps that can create AI images and help you with image-editing tasks. Some Leonardo AI equivalents are Adobe Firefly, Bing image creation, Canva AI, Midjourney, DALL_E, and Gamebook.
If you want to learn how to setup Midjourney, you can see step by step guide to learn and experiment that as well by clicking on how to access Midjourney


GIPHY App Key not set. Please check settings
2 Comments